Wednesday, July 8, 2020

Nana's Famous Black Bottom Chocolate Pie

For the holidays, my mom makes this INSANE chocolate pie that is a holiday must have for my kids. They usually asking about it in October. "Mom, are we going to have Nana's chocolate pie for Thanksgiving?"
I don't have a picture right now......stayed tuned.

Black-bottom Chocolate Pie

Filling
2/3 cup sugar
1/4 cup cornstarch
2 tablespoons unsweetened cocoa powder
Pinch of salt
6 large egg yolks
2 cups low-fat (1%) milk
1/2 cup chilled whipping cream
6 ounces bittersweet (not unsweetened) or semisweet chocolate, chopped
1 tablespoon dark rum
1 teaspoon vanilla extract
Chocolate Crumb Crust - or purchase a pre-made chocolate cookie crumb crust at supermarket

Preparation

For Filling:
Whisk first 4 ingredients in heavy medium saucepan to blend. Whisk in egg yolks to form thick paste. Gradually whisk in milk, then cream. Whisk over medium-high heat until mixture thickens and boils 1 minute. Remove from heat. Add chocolate and whisk until smooth. Whisk in rum and vanilla. Cool 5 minutes, whisking occasionally. Transfer filling to frozen crust. Chill until cold, at least 2 hours and up to 1 day.

For Topping:
Beat first 3 ingredients in large bowl until firm peaks form. Spoon whipped cream into pastry bag fitted with large star tip. Pipe rosettes around edge of pie. Garnish with chocolate curls. (Can be made 4 hours ahead; chill.)

I use a premade chocolate crust in a tin pie plate. 

Thursday, April 16, 2020

No Knead to Eat Packaged Bread

No Knead Bread

If you want your kitchen to smell truly amazing, I have the perfect recipe for you. I use my Le Creuset 5 quart heavy Dutch oven (click to see what I am talking about) to make this unreasonably delicious and super easy bread. It's perfect for quarantine because although it needs time to develop, it is not messy and made from only a few ingredients. This is one of the very favorite foods of my daughters, who also recommend that you tear into it instead of slicing!

I use my food scale as it is more accurate, but have included the Imperial measurements if you don't have one.

This recipe is from Epicurious, (click to go there), but I have included the recipe below with my additional notes.

INGREDIENTS
400 grams (3 cups)  bread flour
8 grams (1 1/4 teaspoons)  table salt
1 gram (1/4 teaspoon)  instant or other active dry yeast
 300 grams (1 1/3 cups) cool water (55 to 65 degrees F)
Additional flour for dusting

DIRECTIONS
1. In a medium bowl, stir together the flour, salt, and yeast. Add the water and, using a wooden spoon or your hand, mix until you have a wet, sticky dough, about 30 seconds. This is going to be super sticky. Keep adding a little water until you get there.  Cover the bowl with a kitchen towel and let sit at room temperature (about 72 degrees F), out of direct sunlight, until the surface is dotted with bubbles (Note: the bubbles are really small which confused me the first time,) and the dough is more than doubled in size. This will take a minimum of 12 hours and (my preference) up to 18 hours. if you start it at night before you go to bed, you will get the full 18 hour rise and can eat for dinner the next day. This slow rise—fermentation—is the key to flavor.

2. When the first fermentation is complete, generously dust a work surface (a wooden or plastic cutting board is fine) with flour. Use a bowl scraper or rubber spatula to scrape the dough onto the board in one piece. When you begin to pull the dough away from the bowl, it will cling in long, thin strands (this is the developed gluten), and it will be quite loose and sticky—do not add more flour. Use lightly floured hands or a bowl scraper or spatula to lift the edges of the dough in toward the center. Nudge and tuck in the edges of the dough to make it round.

3. Place a cotton or linen tea towel (not terry cloth, which tends to stick and may leave lint in the dough) or a large cloth napkin on your work surface and generously dust the cloth with wheat bran, cornmeal, or flour. Use your hands or a bowl scraper or wooden spatula to gently lift the dough onto the towel, so it is seam side down. If the dough is tacky, dust the top lightly with wheat bran, cornmeal, or flour. Fold the ends of the towel loosely over the dough to cover it and place it in a warm, draft-free spot to rise for 1 to 2 hours. The dough is ready when it is almost doubled. If you gently poke it with your finger, making an indentation about 1/4 inch deep, it should hold the impression. If it doesn't, let it rise for another 15 minutes.

4. Half an hour before the end of the second rise, preheat the oven to 475 degrees F, with a rack in the lower third position, and place a covered 4 1/2–5 1/2 quart heavy pot in the center of the rack.

*Note: keep an eye on it. I don't know if I have an especially hot oven, but my bread never takes this long, and the bread develops a lovely crust when you take off the lid so you don't want to cut out that part. 

5. Using pot holders, carefully remove the preheated pot from the oven and uncover it. Unfold the tea towel, lightly dust the dough with flour or bran, lift up the dough, either on the towel or in your hand, and quickly but gently invert it into the pot, seam side up. (Use caution—the pot will be very hot.) Cover the pot and bake for 30 minutes.

6. Remove the lid and continue baking until the bread is a deep chestnut color but not burnt, 15 to 30 minutes more. Use a heatproof spatula or pot holders to carefully lift the bread out of the pot and place it on a rack to cool thoroughly. Don't slice or tear into it until it has cooled, which usually takes at least an hour.

Tuesday, April 14, 2020

Garlic Butter Chicken Tenders

Well, many years have passed! During those years, my kids got really big and we moved to Austin, TX......which I will write about later, but for now, fast forward to the 2020 Covid-19 stay at home order. While at home, I thought I would update the blog with many of the recipes I have discovered and use frequently in the past few years. I might not have many photos, so I will try to come back and update the posts with some appetizing pictures. Until then, we play pretend.

Here is one of my very favorite, quickest and easiest recipes EVER. Probably 20 minutes for real. Not like on the Food Network 20 mins. 20 minutes from the stuff being in the fridge to hot on a plate.  Just steam some veggies, rice etc, and you have a great meal.

Since we are all focused these days on limiting trips to the store, I am including a brief discussion of ingredients. You probably have a lemon, butter and some garlic on hand. You may not have Lawry's seasoning salt, which I learned about from Ree Drummond, have found it to really lend some flavor in general to the chicken. It's worth getting a container of it. I also have always cooked this in a big cast iron skillet. I really don't know how it would turn out in a regular pan. FYI.

Ingredients

1 lb chicken tenders
1 tsp smoked paprika
1 tblsp Lawry's seasoning salt (adjust to taste)
3-4 tbsp of unsalted butter
3-4 cloves of garlic- minced
juice from half a lemon
chopped fresh parsley if desired

Directions

1. Season the chicken tenders with smoked paprika and Lawry's seasoning salt.

2. Heat up a cast iron skillet to med high and add 3 tblsps of butter. When it is sizzling, add the seasoned chicken tenders. Cook for a minute or two minute, then turn over and cook the other  side.

3. This is sort of weird but hang in there with me because I think this is part of the reason the chicken is so juicy.. Push the chicken to one side, and then add more butter and the garlic. Stir it all together.

4. Add the lemon and cook them until they are brown and cooked through. Top off with the chopped parsley.

Sunday, December 18, 2016

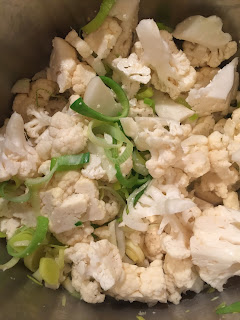
Holiday Detox- Cauliflower LeekTurmeric Soup

Overindulged a bit? Want to make up for it - but don't want salads or unsatisfying and sugary juices? Try this soup! My cauliflower leek turmeric soup is packed with nutrients and fiber. It is low calorie but satisfying.  It also contains the wonder spice turmeric, which is now being studied as a therapy for everything from depression to Parkinson's disease. And if nothing else- it really is creamy, comforting, and delicious. And the bonus to making it yourself- you can control the sodium content. 

I


Ingredients:
Sea Salt
1 tblsp coconut oil (I use refined as I don't like the taste of unrefined)
2 leeks, sliced thin. Use only white and light green parts, unless you don't mind the color being neon yellow green at the end.)
1.5 lbs (or a large head) of cauliflower chopped into pieces. Should be about 4 cups of 1 inch pieces.
2 cloves of minced garlic
1 tsp thyme
1/2 tsp ground turmeric
1/4 tsp cayenne pepper
4 cups chicken broth (Or use miso or vegetable broth)

Optional:
2 tbsp minced fresh parsley for garnish
Microgreens for garnish

Saute leeks and garlic in the coconut oil in a large heavy bottomed pot over medium heat for 2-3 minutes. The idea is to soften them a bit. Stir in the cauliflower and thyme and saute for another minute.

Now add the broth, turmeric and cayenne. Turn the heat to high and boil. Once it comes to a boil,  cover and reduce heat to medium low. Leave it simmering for about 20 minutes.

Now, here comes the part that can be tricky. It needs to go into the blender. My blender can't do the whole recipe at once. I've found the easiest way is to do this in batches. You want to blend it on the pureee setting until it is completely smooth. Once it is is blended, you can return it to the pot to keep warm.

Serve in bowls, with parsley and microgreens sprinkled on top.

I also freeze this in individual portions, and grab for quick work lunches. It's surprisingly comforting and filling.


Friday, August 26, 2016

Pink Pickles


Pickled Red Onions
I spotted these absolutely gorgeous red onions at the farm stand a few weeks ago. I just couldn't resist their shining, glorious color. I got them home and then didn't really know what to do with them- it was a LOT of onion. My sister suggested pickled onions, which I love at restaurants, but never thought of making myself. She assured me it was quite easy. I began experimenting with them. It is fun on so many levels- you can use beautiful mason jasons to store them in! Their lovely pink color and unique flavor adds beauty and zest to salads, sandwiches, or my favorite- tacos! And, best of all, they are so easy! The whole thing takes maybe 10  minutes and it lasts a few weeks in the fridge. Here's the recipe I ended up with. 


1 Medium Red Onion
1/2 Teaspoon Salt
1/2 Teaspoon Sugar
3/4 Cups white or apple cider vinegar (use good quality)
1 clove of garlic, halved
4-6 black peppercorns
Kettle of water for blanching
A container for storing them in- I recommend a glass mason jar, or other non-reactive container such as ceramic. Avoid plastic and metal.

Note: You can also add some herbs like thyme- or if you want to make it spicy, put a small red chili pepper in there! Yum!

Directions
Put the kettle of water on to boil. 
Peel off the outer skin of the onion
Thinly slice the onion into 1/4 inch rounds.
Place the onions into a sieve and put it in the sink. Pour the boiling water slowly over the sliced onions- this will blanch them. 
Combine the sugar, salt, vinegar, garlic and anything else you are putting in there. 
Add the drained onions to the jar, stir and put them in the fridge. 
Wait a few hours before serving so the flavor sinks in.
DELICIOUS! 


Friday, February 6, 2015

Lamb Basque Stew

Hi all- Quick post. Since it is completely freezing out, I decided to give you a warm stew to make for dinner Sunday. I am just going to tell you flat out this is not my recipe. For once in my life, I did not feel any need to tinker. The recipe is from a site called simplyrecipes.com. The stew has a very unusual set of flavors, and is a wonderful improvement on old fashioned beef stew. I make it in a crock pot instead of on the stove, just for practical reasons. All you have to do is brown the meat first, then throw it in the crock pot on low for 4 hours or so. Try it!

Here's the link:
http://www.simplyrecipes.com/recipes/basque_lamb_stew/#ixzz3QzsLIhP5

3 1/2 lbs. lamb shoulder, cut into 2 inch pieces
6 cloves garlic, crushed and peeled
1 sprig fresh rosemary, about 1 tablespoon chopped
1/2 cup dry white wine
2 Tbsp extra-virgin olive oil
1 large onion, peeled and chopped
Salt
2 teaspoons sweet paprika
1 10-ounce can roasted red bell peppers, cut into 1/2 inch strips
1 large ripe tomato, peeled, seeded, and chopped
2 tablespoons chopped fresh parsley
1 bay leaf
1 cup dry, full-bodied red wine
1 cup chicken stock*
Freshly ground black pepper

Method
1 Combine the lamb, half of the garlic cloves, rosemary, and white wine in a medium bowl. Let marinate for 2 to 3 hours. Drain the meat, discard the marinade, and pat dry with paper towels. Mince the remaining garlic cloves and set aside.
2 Heat olive oil in a large, heavy-bottomed pan with lid, over medium-high heat. Working in batches, brown the meat on all sides, about 10 minutes per batch. Salt the meat as it browns.

3 Remove the meat from the pan and add the onions to the pan. Cook, scraping browned bits stuck to the bottom of the pot with a wooden spoon, until the onions are soft, about 5 minutes. Add the garlic and cook another minute.

4 Return the meat to the pan with the onions and garlic. Stir in paprika, roasted peppers, tomatoes, parsley, bay leaf, and red wine. Bring to a boil, reduce heat to medium, and simmer uncovered for 15 minutes, allowing the liquids to reduce a bit. Then add the chicken stock, bring to a boil, reduce heat to low and simmer, covered, stirring occasionally, until meat is very tender, 2 to 2 1/2 hours. Add freshly ground black pepper and more salt to taste.


Monday, January 26, 2015

Skip the coffee, go straight to coffee cake


Here's the thing about coffee cake. All that stuff you find in grocery stores and even most bakeries has nothing to do with real coffee cake.  Real coffee cake is rich and the texture is out of this world.  You find yourself thinking about it for the rest of the day- what the heck was in that? And how can I get some more? I really hope you try this recipe. It might just change your life. Or at least impress your mother-in-law.

The recipe is not difficult, but it takes a few steps, and you really do need buttermilk- the lactic acid in buttermilk is what turns the cake from ho-hum into holy moly. I think this recipe is a bit easier than others because it combines the making of the crumb topping with the making of the cake. Another item to note- I use both a Kitchen Aid mixer and a Cuisinart food processor. These tools are not necessary, but they sure make it a snap.

The other great thing about coffee cake is that it is incredibly flexible. Once you see how easy the basic recipe is, you can start adding your own variations- add blueberries! Mini chocolate chips sprinkled over the top! Crumb topping in the middle! The sky is the limit here. 

Ingredients

To prepare the pan:
Butter or cooking spray
1 tblsp flour for dusting

Cake:
2 cups all purpose flour, sifted
1 cup + 2 tblsp sugar
1 tsp salt
10 tblsp unsalted butter, cold
1 tsp baking powder
1/2 tsp baking soda
3/4 cup buttermilk, at room temp
1 large egg, at room temp
2 tsps vanilla extract
2/3 cup brown sugar
1 tsp cinnamon


My mother asked me how I get the topping so crumbly. I process it in the food processor. That's all.

Directions:

1. Preheat oven to 350 degrees Fahrenheit.
2. Prepare the pan. I use a 9 inch spring form pan. If you don't have one, or have no idea what I'm talking about, use a 9x9 square baking dish. It's just a bit easier to get out with the spring form pan. Spray or grease the sides and bottom of the pan, then lightly dust all over with the 1 tblsp flour.
3. Now, mix the flour, sugar, baking soda, baking powder and salt together in your mixer or by hand until combined.
4. Cut the cold butter into small pieces.
5.Put the flour/sugar/salt/soda/powder mixture in the Cuisinart. Toss in the butter. Process for 15 seconds or until it is a coarse meal. Set aside 1 cup of this butter/flour mixture for your crumb topping.
6. Put the rest of the mixture back in the Kitchen Aid mixing bowl. Add the room temperature buttermilk, egg and the 2 tsps vanilla. Mix everything until it is smooth, and it will resemble frosting, (as my daughter pointed out). The batter will be super thick and smell so good!
7. Spoon the batter into the prepared pan and smooth the top.
8. Make the crumb topping by adding the brown sugar and the cinnamon to the reserved flour/sugar mixture. Mix with a fork until blended will but still a little crumbly. Sprinkle the crumb topping over the cake batter.
9. Bake the cake at 350 until a toothpick inserted in the center comes out clean, and/or the middle is firm to the touch. Takes approximately 55 minutes, depending on your oven.

Be sure to cool for 10 minutes in the pan and then take it out! Don't leave in the pan too long, or try to take it out immediately. It takes about 2 hours to cool completely, although we can never wait that long. And it's even better after a day or so! Enjoy.